

Basic Card Scraper Sharpening
By Chris Black
Card scrapers are one of those tools that almost everyone knows about but few actually use. You may even own one having acquired it with the intention of learning how to use it but to this day it’s buried in a drawer. Having taught many students over the years to use scrapers, I found the problem usually lies in the perception that it’s a difficult and lengthy process to sharpen them. In actuality there are only 3 steps to sharpening a card scraper. Follow them and you’ll be moving a belt sander amount of wood without blowing a metric ton of dust in the air. You can even go from approximately 80-180x sandpaper in one stroke. 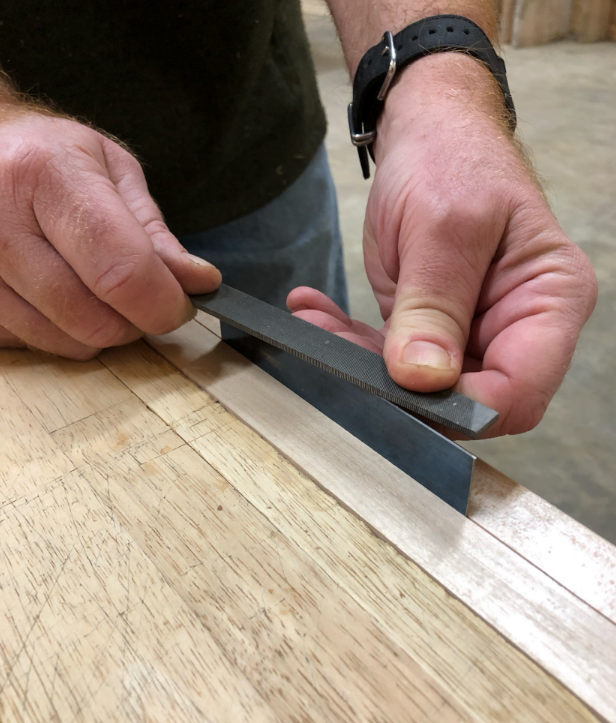
Step 1. File the Long Edges
You’ll need a flat, 6” or an 8” single cut, metal cutting file.Place the scraper in a bench vise with a long edge up and protruding past the top of the vise about the thickness of your fingers. Now with both hands pinching opposite sides of the face of the file (one up front and the other back towards the tang), skew the file and firmly pass it over the edge of the scraper say 4-6 times. Try to keep the file square to the sides of the scraper. Your knuckles riding on top of the vise will help with this.Using lighter and lighter pressure with each pass of the file will minimize the chances of leaving a ragged file burr on the edge of the scraper. If you do develop a burr, you can remove it by running the edge and adjacent sides over a medium or fine sharpening stone.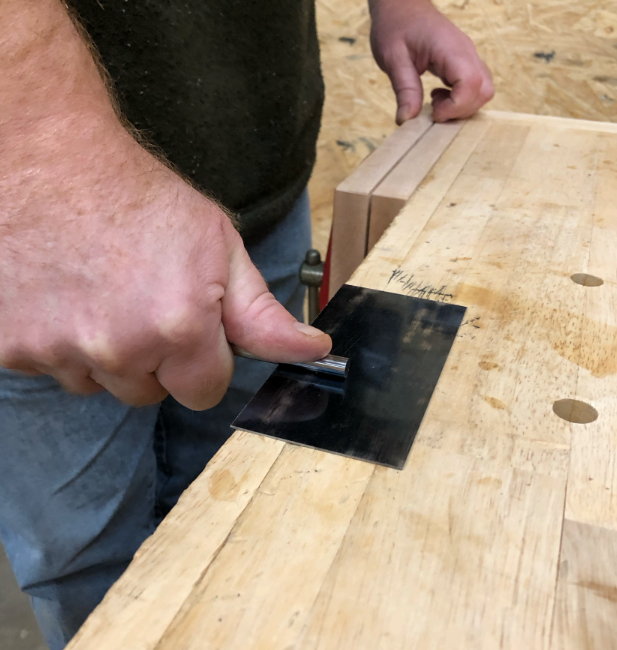
Step 2. Use a burnisher to draw out the edges of all 4 long corners
Lightly coat the steel of the burnisher with any light machine oil such as WD-40 or 3 in 1 oil.Place the scraper flat on the bench with a long edge of the scraper even the edge of the bench.Now put the end of the burnisher’s oiled steel rod flat on the face of the scraper with the rod perpendicular to the edge of the scraper. With firm pressure run the burnisher back and forth flat over all 4 long edges of the scraper 12 times each. This will microscopically deform the corner of the scraper drawing the steel out over the edge. This happens because the burnisher steel (Rc 62-64) is much harder than the steel of the card scraper (Rc 48-50).Remember the burnishing rod must remain dead flat on the face of the scraper with each pass.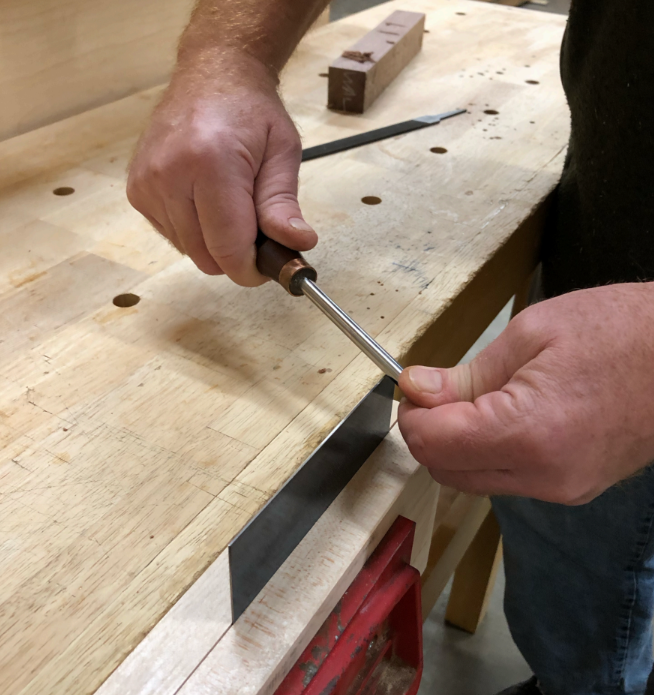
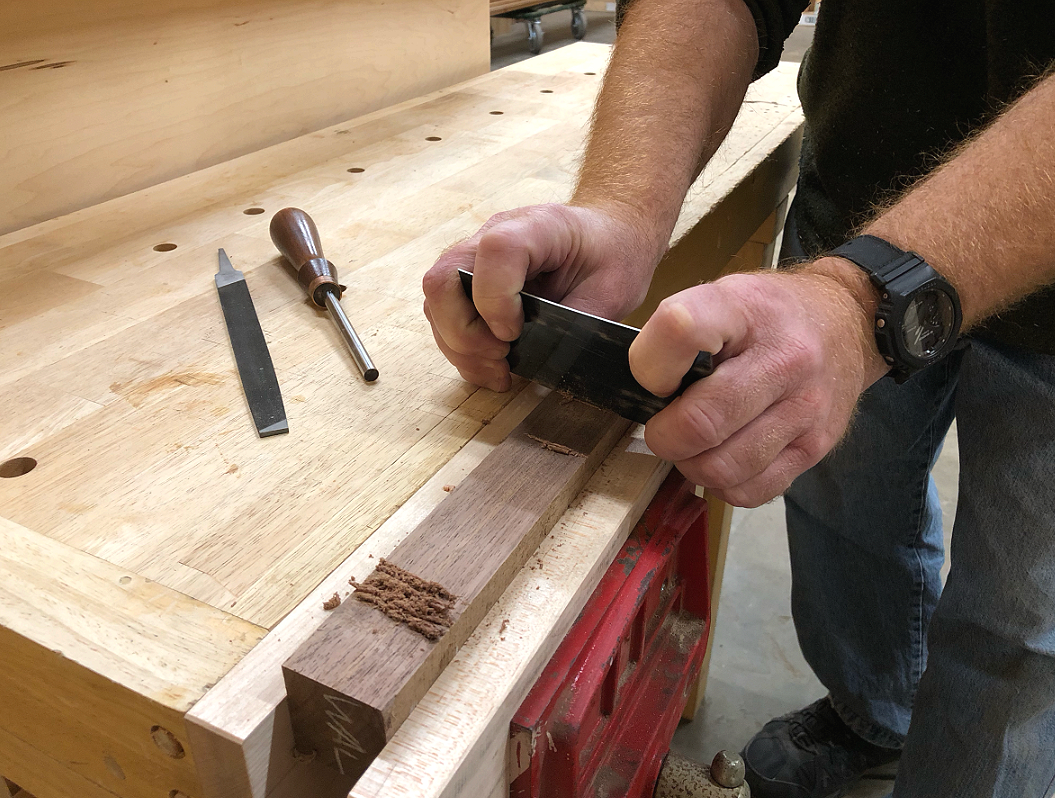
Step 3. Turning the burr
The burr you’ll be making in step 3 is entirely different from the one you may have produced and removed in step 1. This burr is intentionally produced to remove wood efficiently and smoothly regardless of grain direction. So place the scraper back in the vise about halfway down lengthwise and clamp it securely. While holding the burnisher’s handle with one hand and the tip of the rod with the other, place the lubricated burnisher rod on the exposed long edge and tilt the rod about 5 degrees so that the burnisher engages one of the corners. It doesn’t matter which corner because you’ll be turning burrs on both long corners and two more on the opposite side of the scraper. Now with firm pressure push the tilted rod from tip to handle while simultaneously running it along the edge of the scraper and maintaining that 5 degree tilt. Repeat the procedure 3-5 times until you feel the slightest burr develop. Test it by dragging your thumb or finger across the edge and not along it or you will potentially cut your finger. Now do likewise on the remaining 3 long corners of the scraper. What if you don’t think you have a burr? Try using the scraper on a piece of scrap hardwood. You may find it works just fine. If not, don’t get discouraged. Keep at it because acquiring this new skill is certainly worth it. You can always bring your card scraper, burnisher and file by The Lumber District and I’ll give you a free lesson. Just call ahead to make sure I’m here on the day you want to come by.