

Restoring a Set of Auger Bits for a Bit Brace

By Chris Black
Did you know that the humble auger bit incorporates four, and arguably five of the six classic simple machines making it perhaps one of the most complex and ingenious tools with no moving parts? The simple machines are of course the lever, the wheel and axle, the inclined plane, the wedge, the screw and the pulley. I’ll let you decide which of the four or five apply. I’ve always kept a basic set of 13 in my kit. I use them for roughing out mortises, counter boring for bolt heads, drilling holes for chair/stool legs and a dozen other jobs that need a very clean entry hole and where going slow will mitigate the risk of ruining a project. Auger bits usually come stamped on the tapered tang with a number that corresponds to the diameter of the bit in 16ths of an inch. For instance, a #4 auger bit is 4/16’s of an inch or more commonly 1/4”. While there’s a plethora of auger types, the two most ubiquitous are the Jennings pattern and the Irwin pattern. Irwins have a solid center running through the length of the bit while Jennings’ screw turns on helix up to the shank. Both work equally well, in my opinion. What to Look For
So you found a coffee can full of auger bits cleaning out your uncle Sven’s shed...they are covered in rust and look to be in bad shape. No problem, here’s how to evaluate them. Inspect the feed screw that pulls the bit into the wood. Make sure it comes to a relatively clean point, and that the threads are still sharp. The screws can be sharpened, but the process can be difficult and time consuming with often mixed results. Next, place the bit upright on a block of wood as if you were going to bore a hole. Look closely at the cutting lips which are the sharpened inclined planes between the spurs separated by the screw. There should be plenty of relief angle beneath cutting lips which act like wedges to lift the wood while turning the bit. Without the relief angle behind the cutting surfaces, the bit won’t cut properly, if at all. Now with the bit still screw down on the wood, take a look at the spurs. They should be long enough to start scoring the outside diameter of the hole to ensure a clean perimeter. If the cutting lips hit wood before the spurs turn a complete circle, then you’re going to get tear out. Consider tossing a bit whose spurs are now too short. Lastly, sight down the bit to see if it’s reasonably straight. If not, it can be placed in a vise and straightened by bending. Protect the bit and the vise jaws before hand. Rust Removal
Here’s the fun part; take those old rusty bits and soak them in your favorite rust remover. You can go with a commercial product like EvapoRust or a container full of white vinegar. I’ve found if you do a lot of rust removal, it’s cheaper to buy a bag of food grade citric acid crystals. Just add 1/2 cup of crystals to a gallon of warm water and completely submerge the bits in the solution for at least 4-5 hours. Serious rust may take an overnight soaking. Once the rust can be wiped off with a rag, then it’s time to remove the bits from the rust bath. To keep the bits from flash rusting, dry them immediately and clean the bits with a 6” fine wire wheel attached to a drill press or to a lathe chuck by means of a mandrill. Run the drill press or the lathe at a lower rpm to clean the remaining rust and the leftover carbon precipitate. It’s essential to wear personal protective gear, especially eye protection. 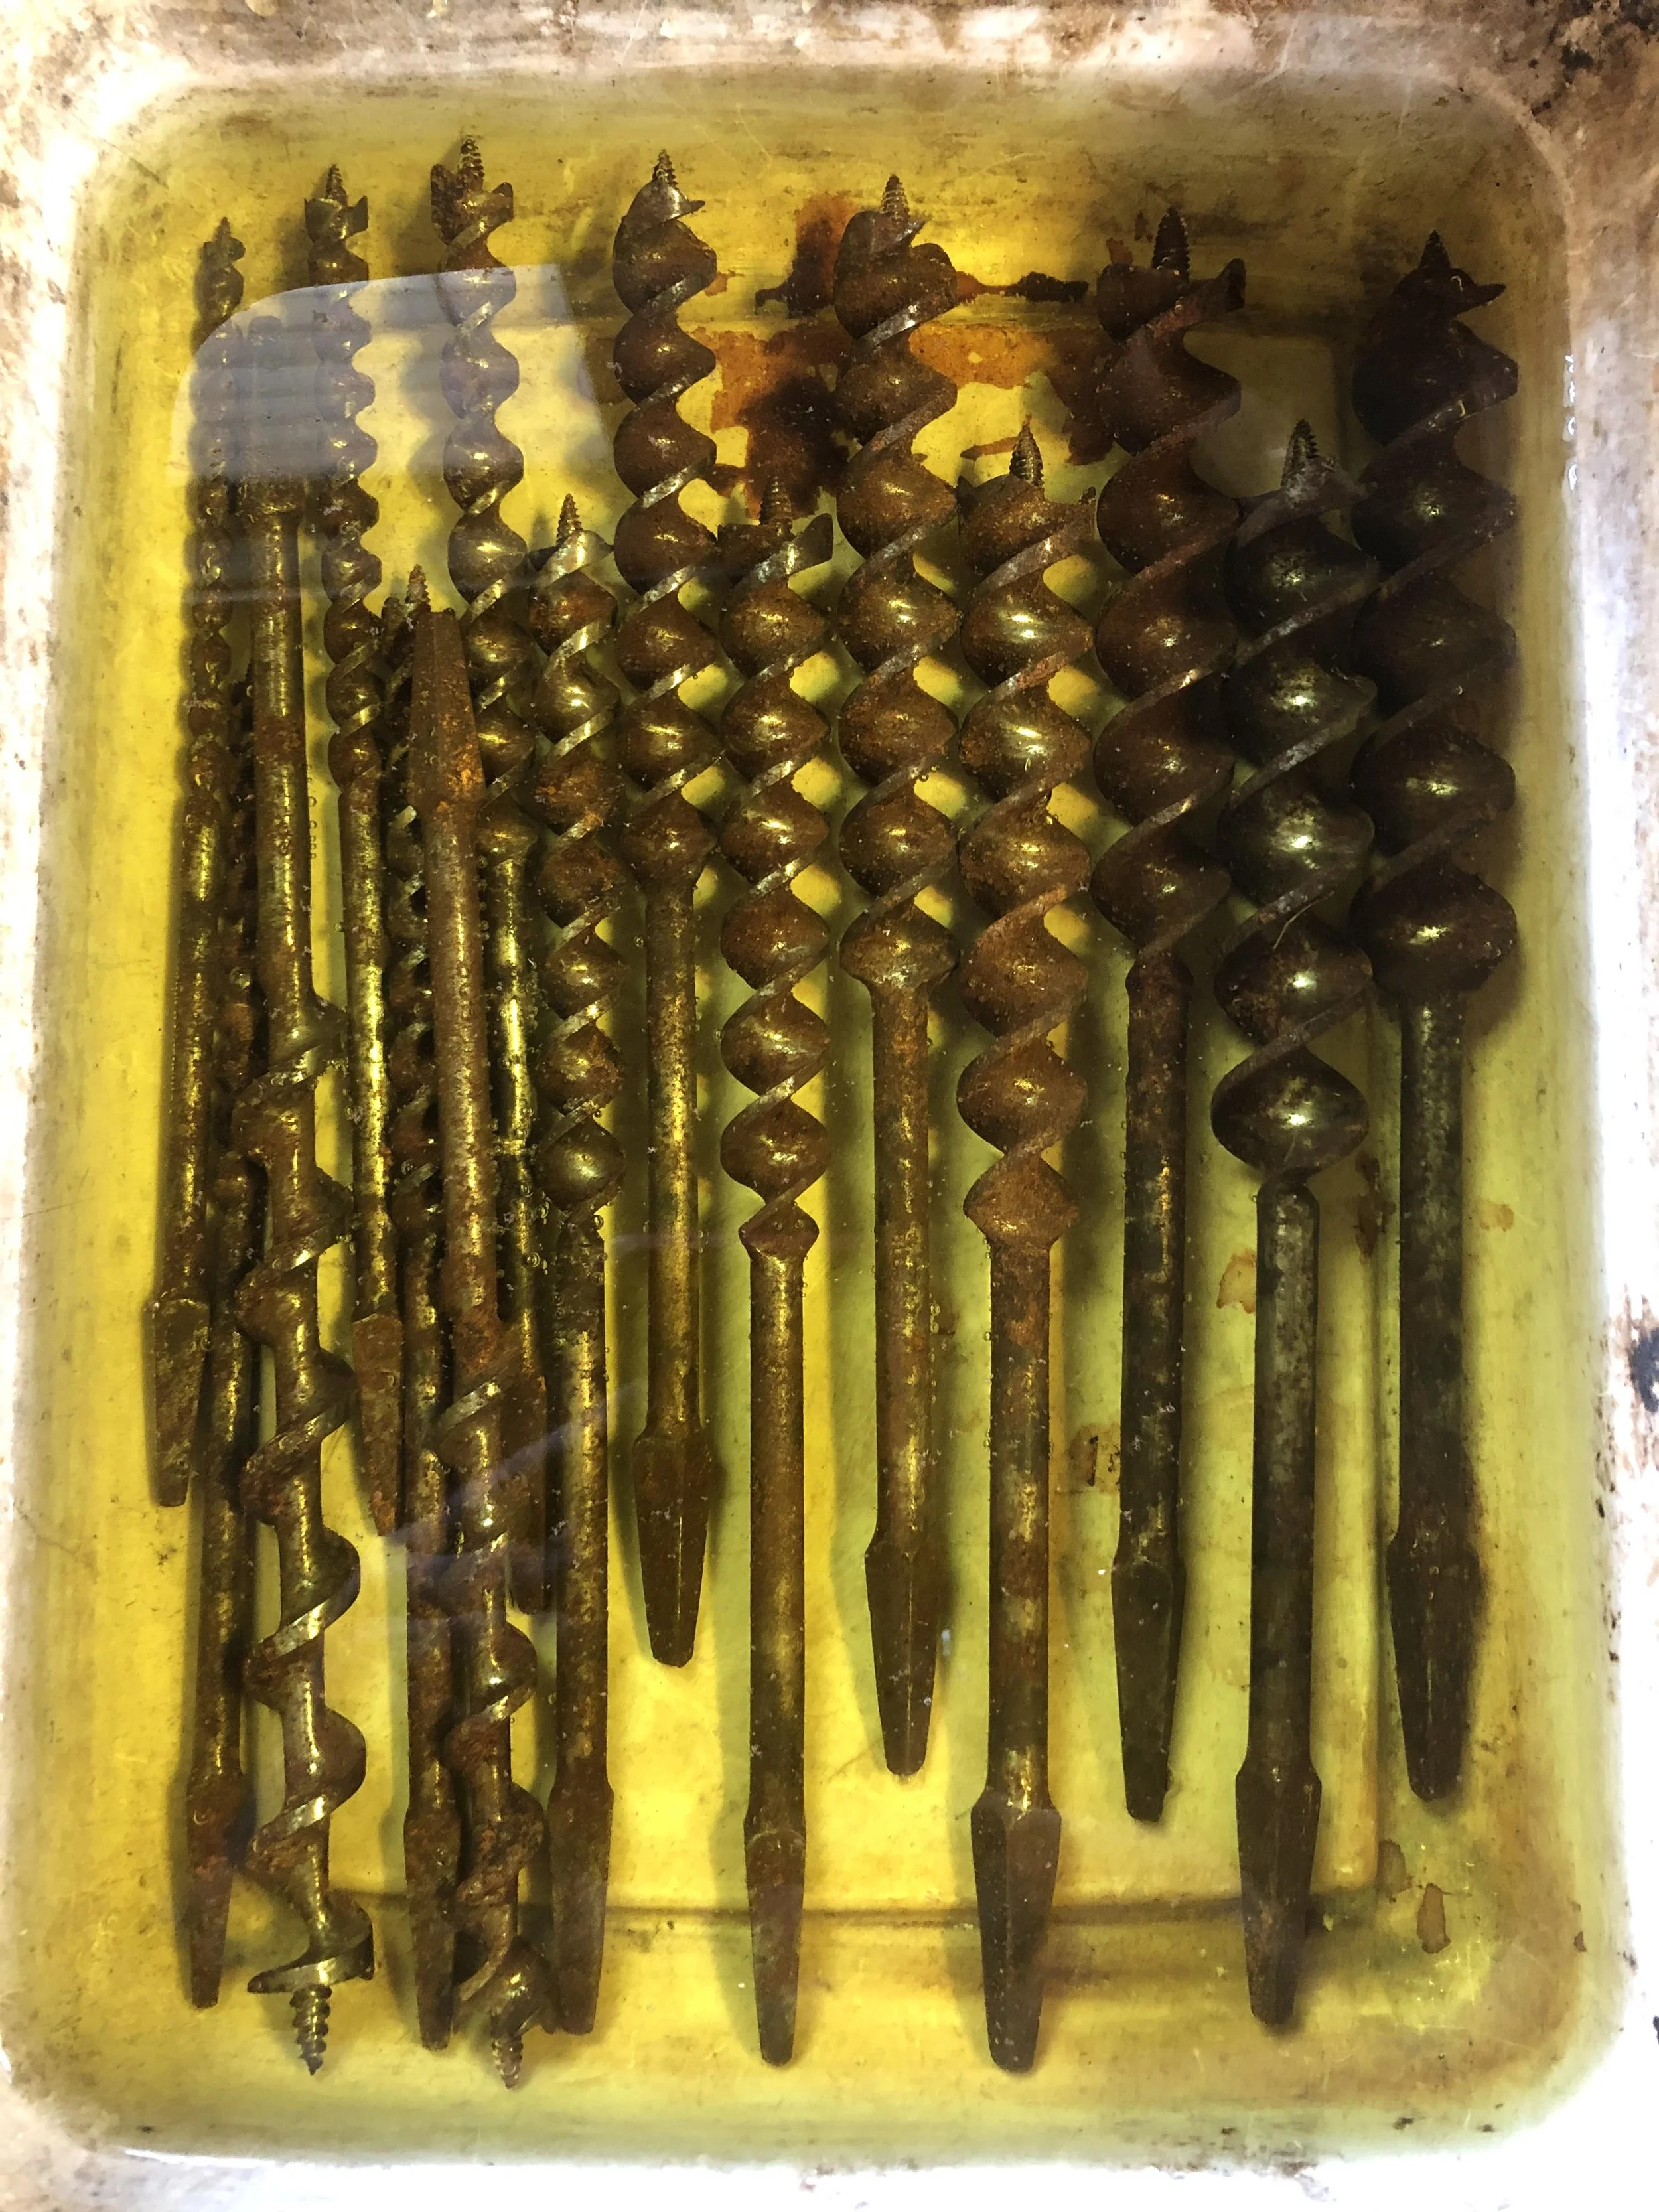
Sharpening the Bits
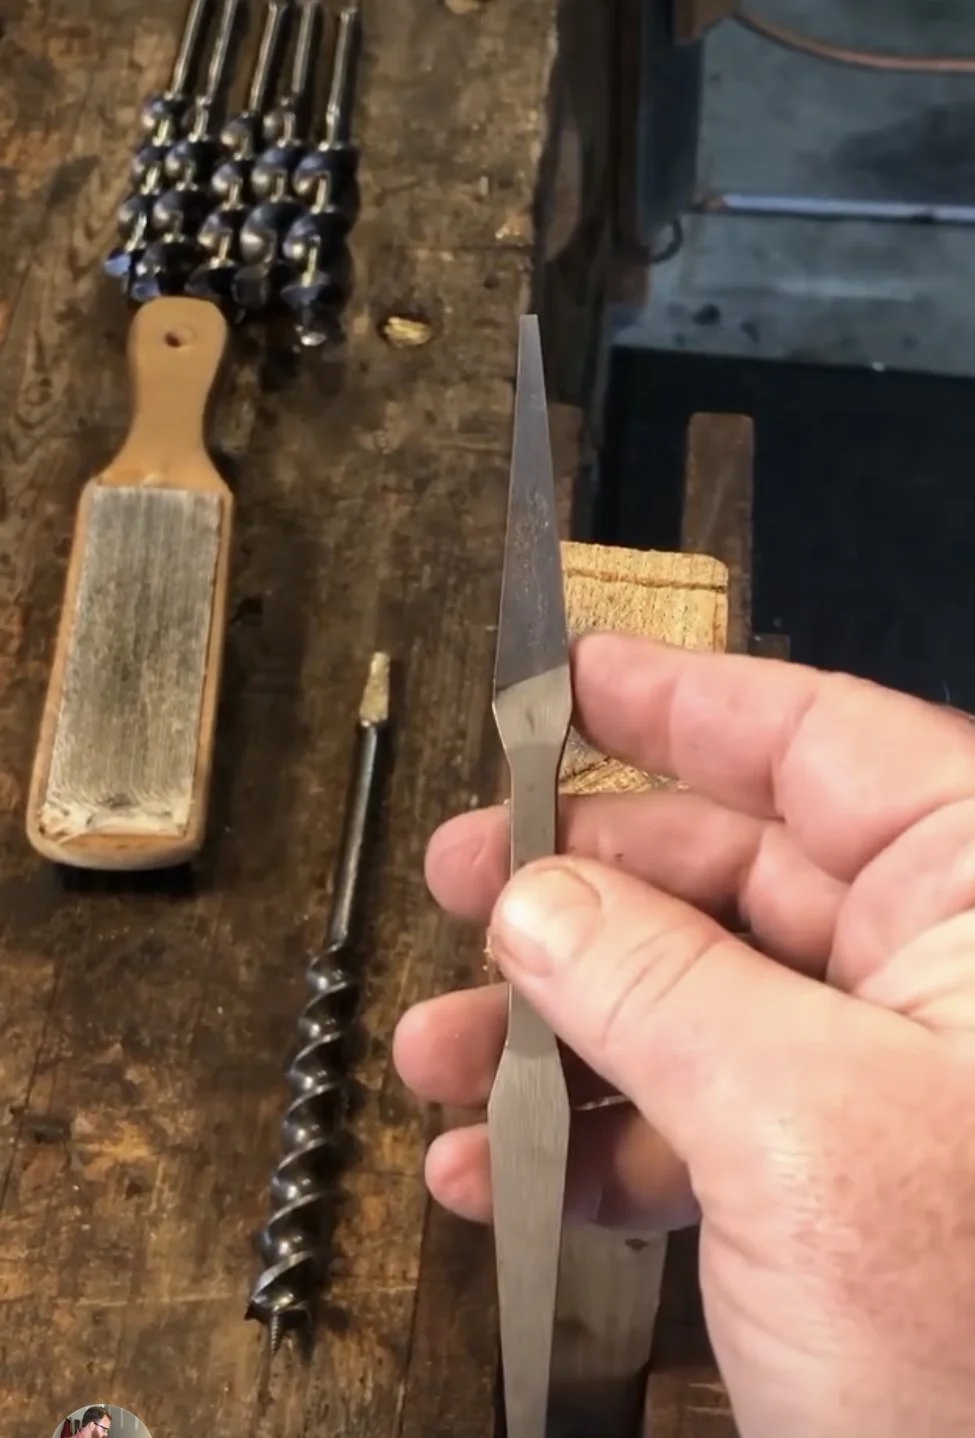
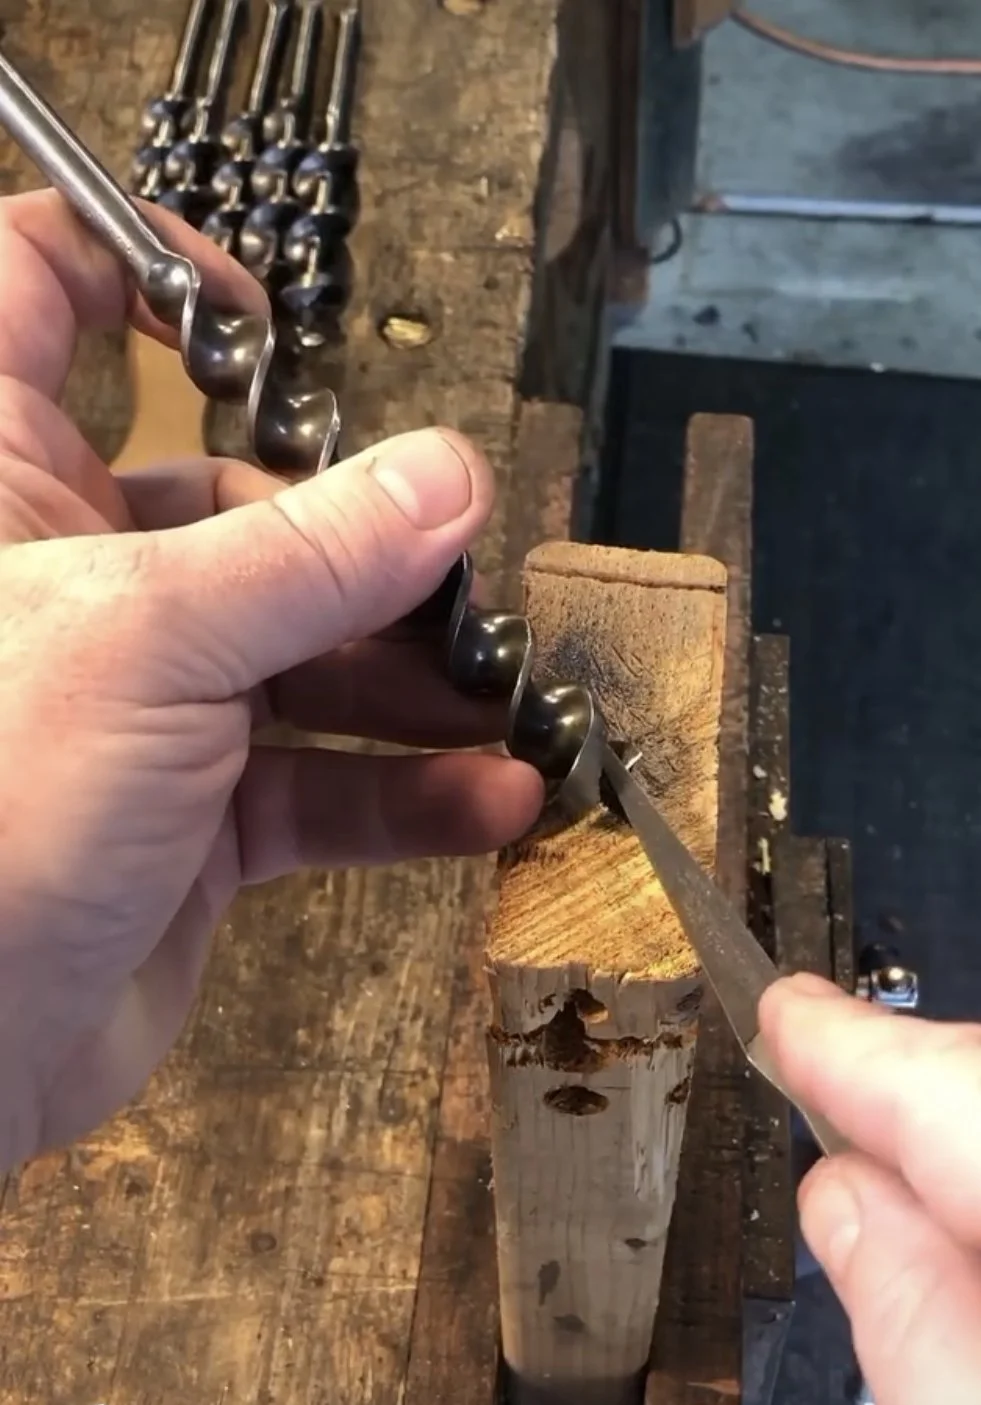
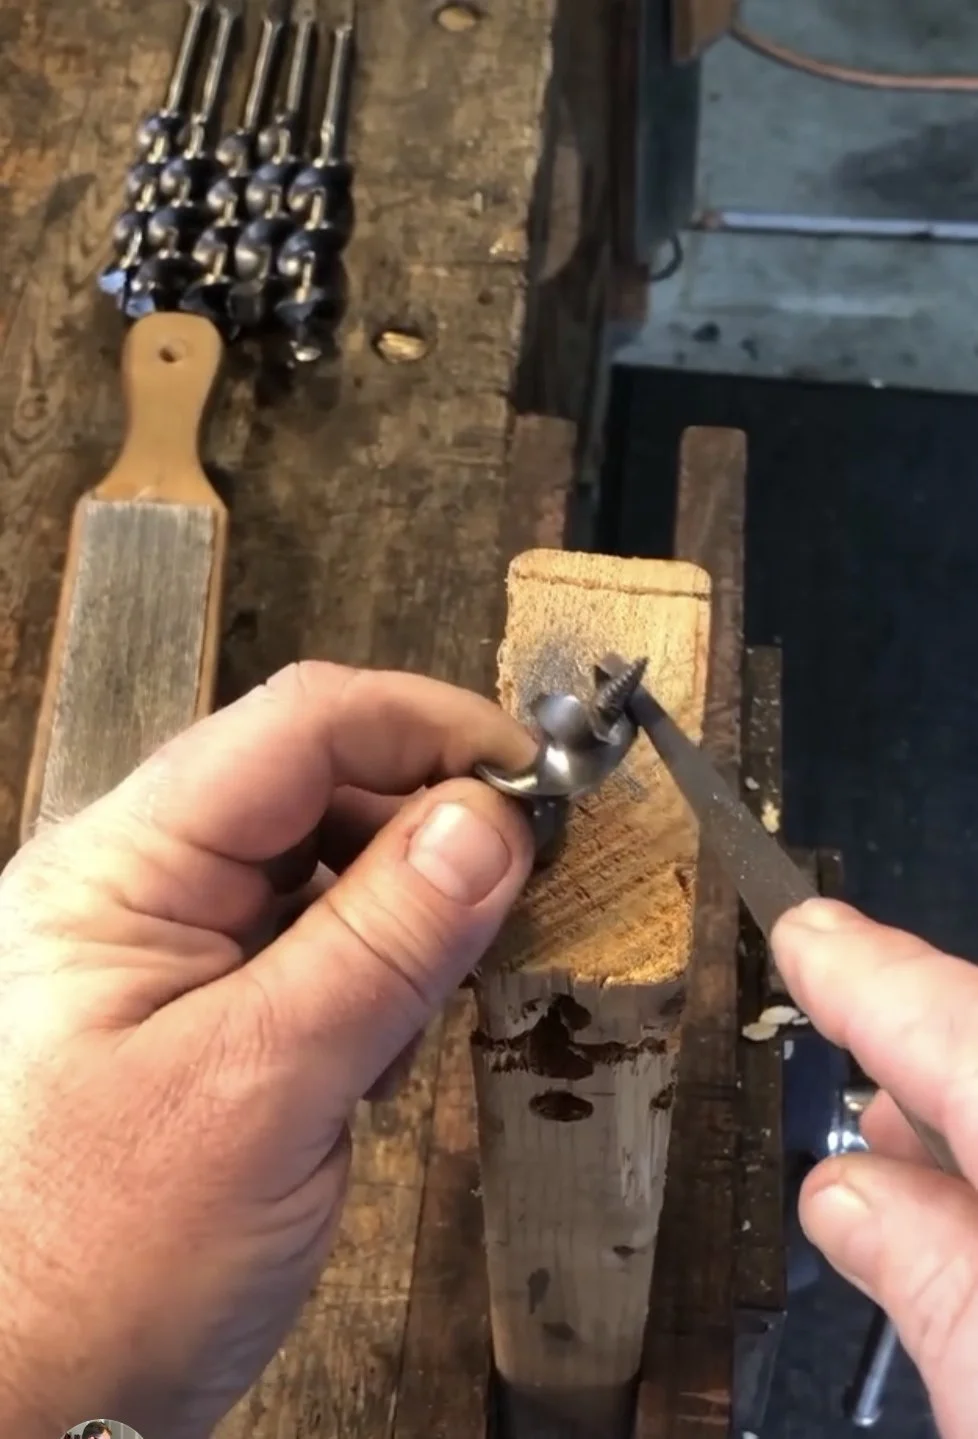
Sharpening auger bits is a fairly simple endeavor. First, you’ll need an auger bit file. You can get by with a triangular file used for sharpening saw teeth, but an auger bit file has safe faces next to the cut surfaces which prevents unintentionally filing an adjacent part of the bit. Assuming the feed screw is serviceable, start by filing the two cutting lips. Hold the bit with the lead screw down and file the top edge of each lip using the existing bevel as a guide. Color the surface with a marker as a reference, if necessary. File until you feel a slight burr on the back of each lip. Do not remove the burr which might risk changing the relief angle. Now flip the bit over with the lead screw up. File the leading interior edge of each spur from the bottom to just past the top curve until a burr forms on the outside edge. Again, no need to remove the burr which could change the bit diameter or to file the trailing edge of the spur. That’s it! Chuck it up in a bit brace and bore some holes.